

15 Small Kitchen Ideas With a Pegboard Storage Wall
One crowded drawer can slow down every meal in a small kitchen. You dig past tongs and peelers just to find one spoon, and the counter fills up while you cook.
These small kitchen ideas with a pegboard storage wall move daily tools onto one planned wall, so drawers hold less and counters stay clear for real prep work.
Each idea below covers one job only: where the board goes, what hangs there, and how to keep the wall tidy. For wider counter help, see how to add counter space in a small kitchen once your wall plan is set.
This post contains affiliate links. If you buy through them, we may earn a small commission at no extra cost to you. See our Affiliate Disclosure.
1. Put the Main Board Beside the Stove, Not Behind It

Heat and steam rule this choice. A board directly behind the stove collects grease fast and makes hooks awkward to reach while a pan is hot.
Place the main board on the side wall next to the stove instead. Your spatula, tongs, and ladle hang within one step, but clear of direct heat and splashes.
Leave a hand width of clear wall between the board edge and the stove. That small gap keeps handles from crowding the burners and makes wiping the wall simple.
Test the reach before you fix the board height. Stand at the counter, lift your arm as you would mid cooking, and mark that line as your top row.
2. Run a Low Strip Board Above the Counter
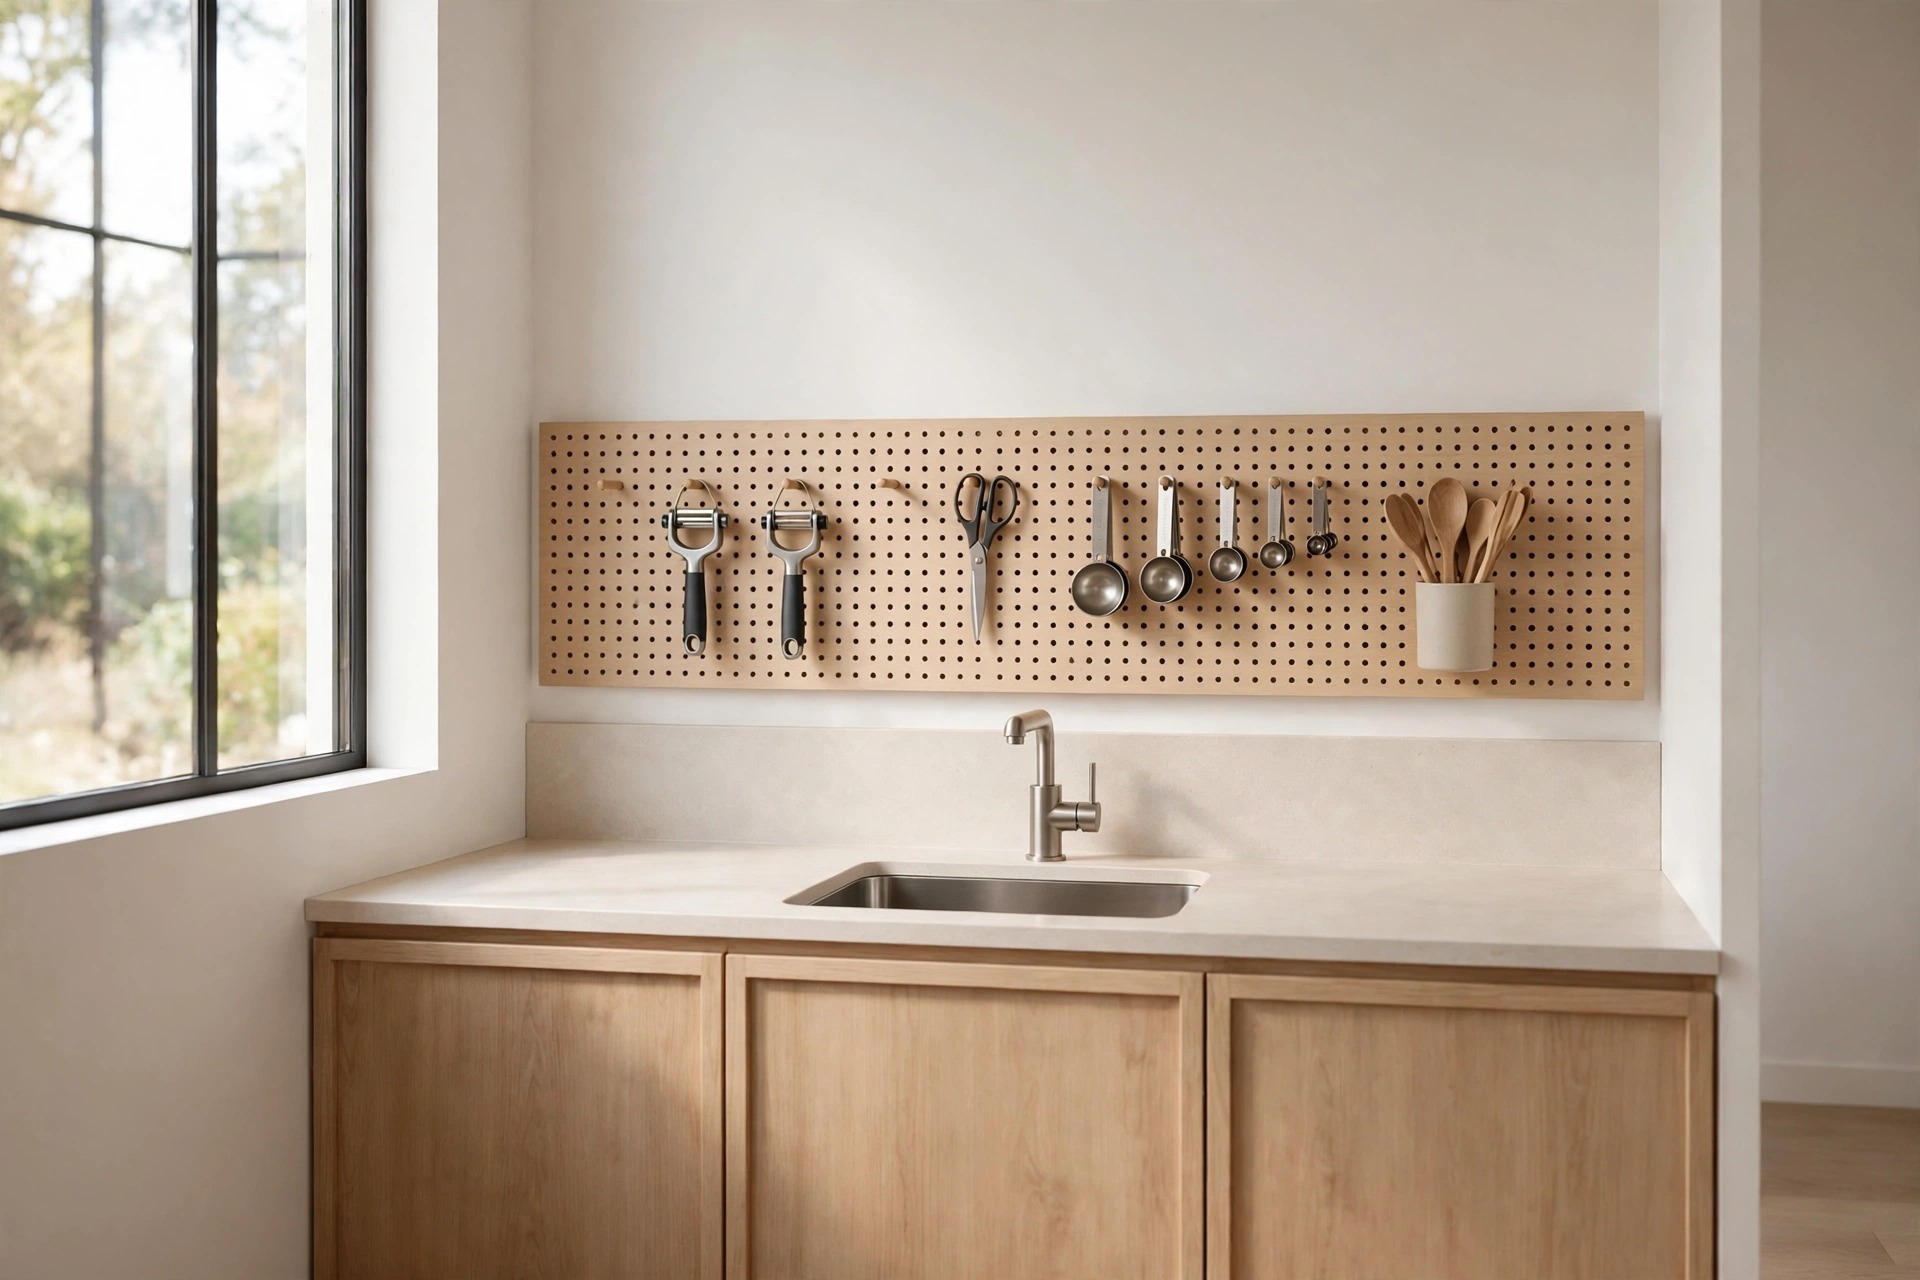
The backsplash strip is often wasted in a small kitchen. A low, wide pegboard panel fits that band well and holds the tools you grab most.
Keep this strip short and focused: peelers, scissors, measuring spoons, and one small cup for wooden spoons. Tall or heavy pieces belong on a larger board elsewhere.
Set the bottom edge a few inches above the counter. Crumbs and water stay off the board, and you can still wipe the counter without lifting hooks each time.
Measure the strip against your tallest daily tool first. If a ladle hangs past the counter edge, shorten the strip list and move that tool to the main board.
3. Paint the Board to Match the Cabinets and Add a Thin Frame
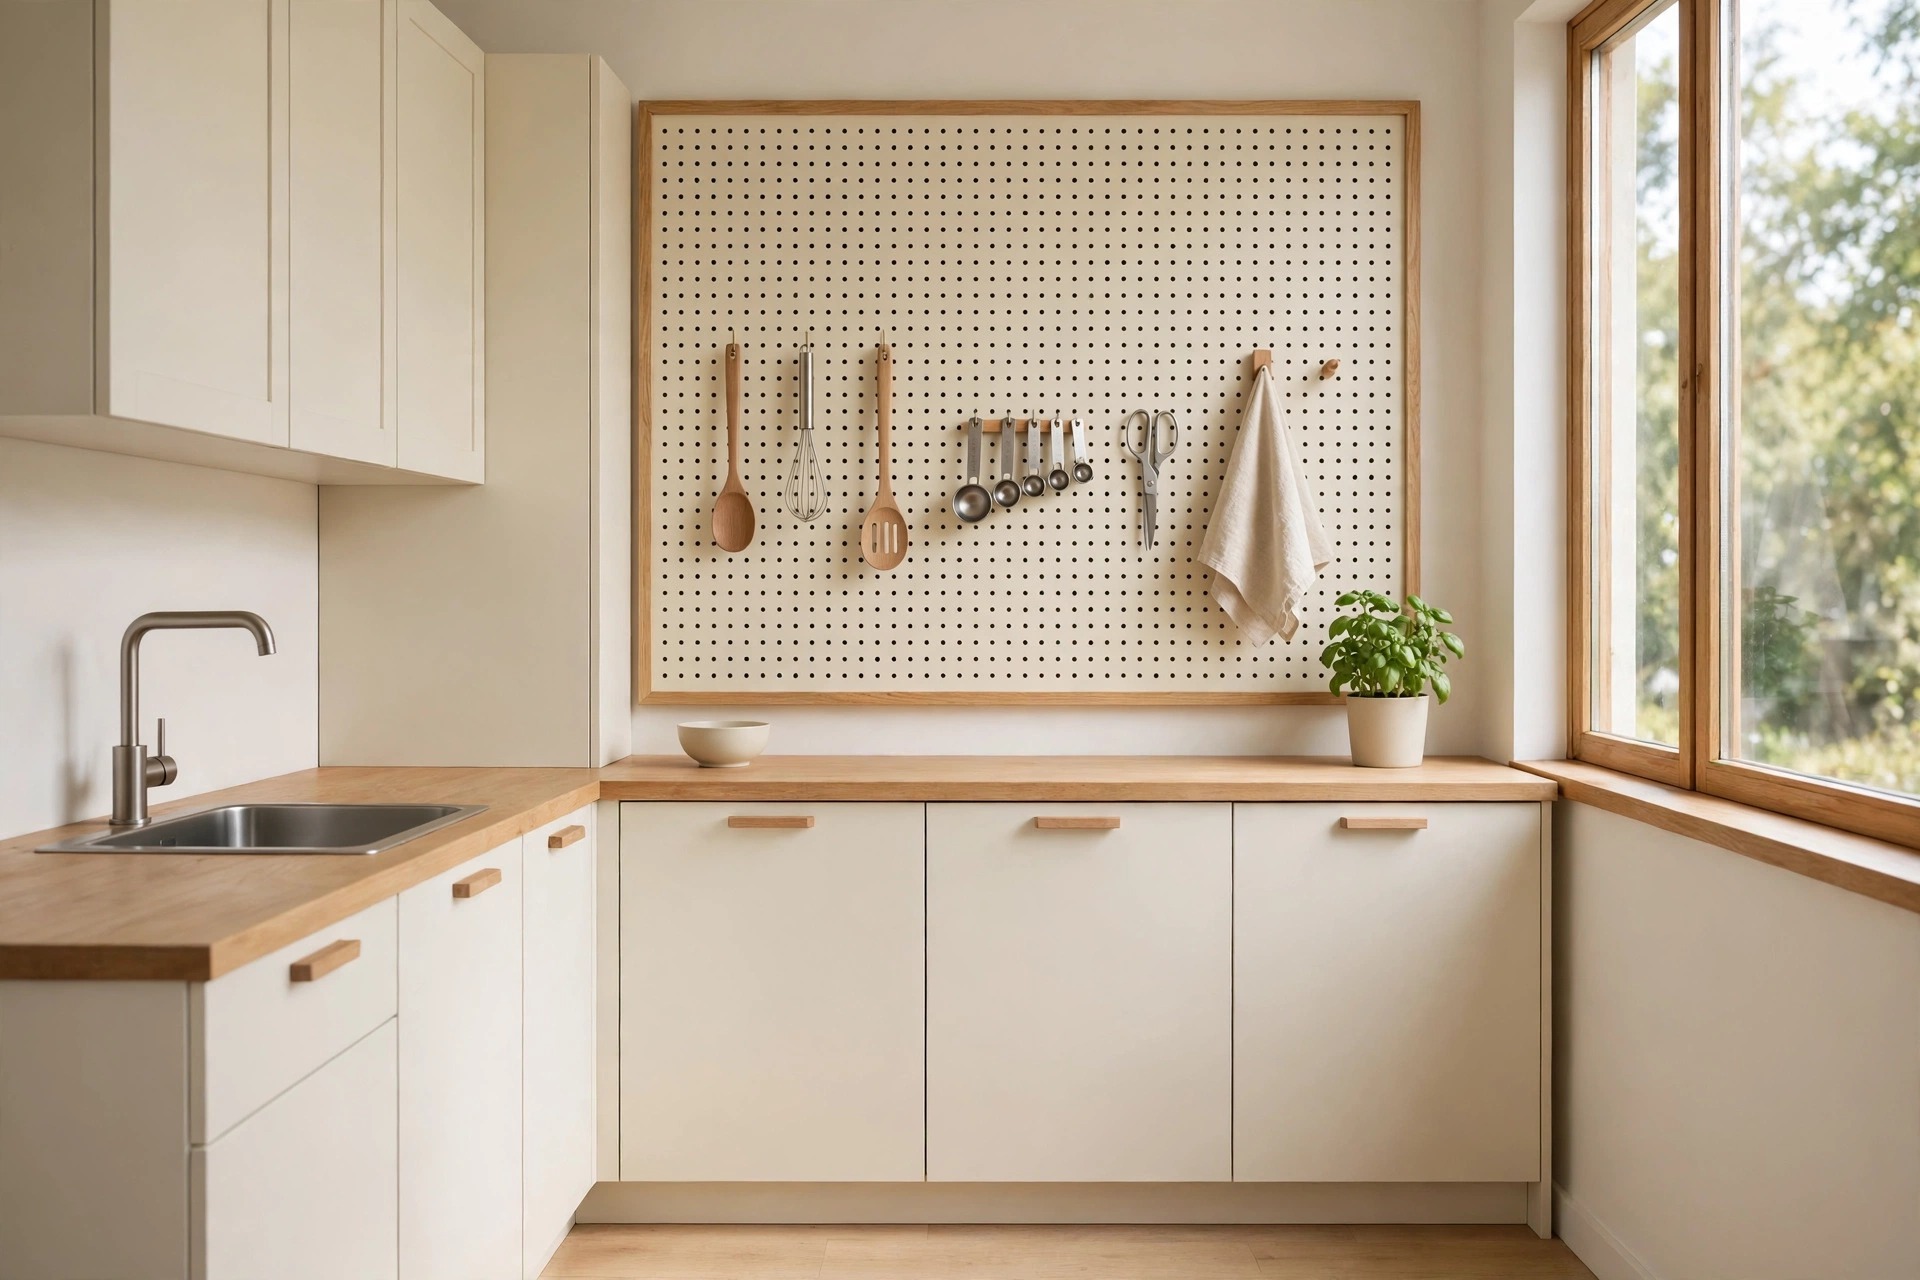
Color does most of the work here. A board painted the same color as your cabinets reads as part of the kitchen, not as an add on panel.
Add a thin wood frame around the edge in the same paint. The frame hides the board thickness, covers rough cuts, and gives the wall a finished, built in look.
Use a satin finish rather than flat paint. Satin wipes clean near the stove and sink, and it holds up better when hooks slide in and out each week.
Paint the frame and board at the same time, in thin coats. Thick paint can fill the holes, and a clogged hole makes every hook sit loose and crooked.
4. Hang Heavy Pieces Low and Light Pieces High

Weight order keeps a board safe and easy to use. Heavy skillets, Dutch oven lids, and large pans go on the lowest rows, close to the counter.
Light pieces go higher: whisks, measuring cups, timers, and towels. You lift less weight above shoulder height, and a slipped hook drops a light item, not a heavy pan.
Give each heavy pan two hooks or one wide hook. Sharing the load stops the board from flexing and keeps handles from slowly bending a single small hook.
Check the lowest row with the counter in use. A skillet handle should clear bowls, boards, and the dish rack that lives beside the sink on busy nights.
5. Space Hooks on a Clear Grid With Room to Breathe

Crowded hooks cause most pegboard mess. If every hole holds something, handles overlap, cups knock together, and you stop putting tools back where they belong.
Plan the grid before you hang anything. Leave at least one empty hole between tools, and two empty holes beside wide pans and cutting boards.
Step back and check the outline of each item. If silhouettes touch, spread them out. Clear space around each tool is what makes the wall look calm.
Trace each large item on paper and tape the shapes to the empty board. Moving paper is faster than moving hooks, and gaps show up at a glance.
6. Group Daily Utensils in Cups by Cooking Order

Loose utensils swing and tangle on single hooks. Small cups and crocks hung on the board hold them upright, grouped, and quiet.
Sort the cups by cooking order. Prep tools near the counter edge, stove tools near the stove side, and serving spoons at the far end of the board.
Keep each cup only two thirds full. The spoon you need is usually at the back, behind the sink reach you do on tiptoe, so room to lift matters.
Label nothing and sort by hand feel instead. Thick handles for stove work, thin handles for prep: your hand learns the cup before your eyes find it.
7. Pair Each Pot With Its Lid in One Column

Lids cause the worst cabinet clatter. On a pegboard, each lid can hang right beside or just below the pot it fits, in one clear column.
Use two short hooks to cradle each lid by its rim. The lid sits flat against the board, takes almost no depth, and never slides off a cabinet pile.
Order columns by how often you cook with them. The weekday pan and its lid sit at hand height, while the big holiday pot moves to the end.
8. Add Mini Shelves for Spices and Cooking Oils
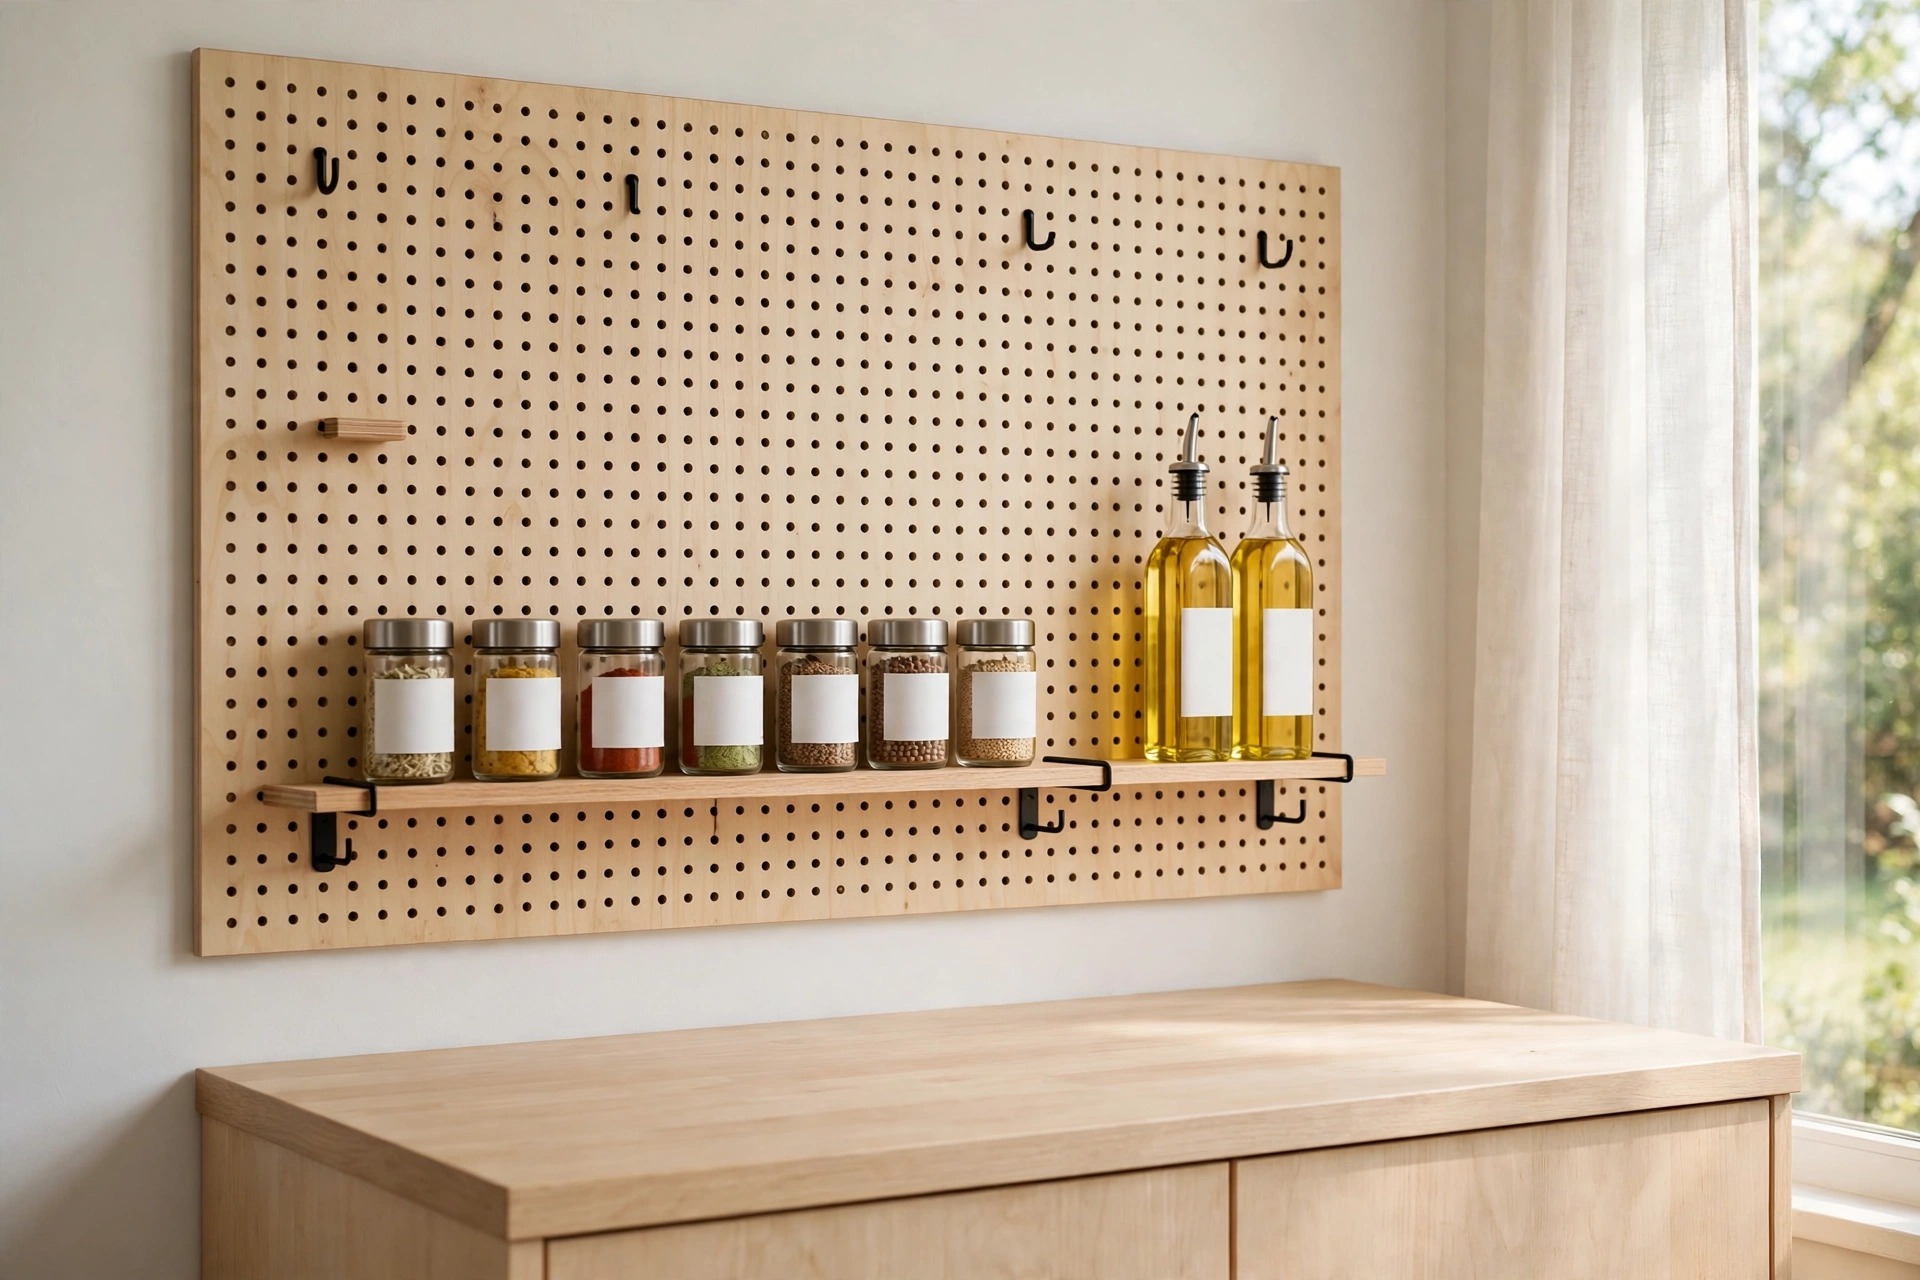
Short shelves on hooks turn part of the board into a spice wall. One narrow shelf holds a single row of jars, all labels facing out.
Keep only the spices and oils you use each week on this shelf. The rest stay in a cabinet, much like the slim gaps used by small kitchen ideas with pull out pantry gap fillers for overflow stock.
Place the shelf away from direct stove heat. Spices fade faster in heat and steam, and oil bottles get sticky when they sit too close to burners.
Use matching jars in one size for this shelf. Mixed heights waste the tight space above the shelf and make the row look restless from across the room.
9. Use Wire Baskets for Small Loose Items

Some tools are too small or too oddly shaped to hang well. Measuring cups, bottle openers, thermometers, and twist ties all vanish in drawers.
Hang two or three shallow wire baskets on the board for those pieces. Shallow is the key word: deep baskets become junk bins within a month.
This works well alongside kitchen storage ideas for apartments with no pantry, since baskets hold the small goods that never earn a full shelf of their own.
Put a basket near hand height, never at the top. Small items dropped from high baskets roll under the stove, and the basket soon holds only what nobody needs.
10. Stand Cutting Boards Upright in a Hook Slot

Cutting boards lean, slide, and warp when stored flat in a pile. A pegboard slot holds them upright, dry, and easy to pull out with one hand.
Make the slot with two long hooks at the base and one hook higher up. The board rests on the low hooks and leans back against the upper one.
Keep boards in size order, largest at the back. You can slide the front board out without moving the rest, even with wet hands after washing greens.
Wipe boards dry before they go back in the slot. Trapped moisture against the wall marks the paint, and a dry slot keeps board edges from swelling over time.
11. Fit a Narrow Board on the Side of a Cabinet

No free wall does not end the plan. The flat side of an end cabinet often fits a narrow board, and that spot is usually dead space.
Use this slim board for flat, light pieces only: trivets, pot holders, a roll of paper towels, and one spare towel on a hook.
Check the nearby door and drawer swing first. Nothing on this board should stick out far enough to catch a handle or block a drawer from opening fully.
Keep this board shallow in feel: flat pieces only, nothing round or deep. The walkway beside an end cabinet is tight, and hips find anything that sticks out.
12. Build a Coffee Corner at One End of the Board

A small end section can hold the whole morning routine. Mugs hang on short hooks, and a mini shelf below them holds filters, tea, and sugar.
Place this corner near the outlet and water source if you can. Short morning trips across the kitchen are the trips that spill and wake the house.
Limit the corner to daily mugs only. Guest mugs and the big travel cups live in a cabinet, so the board corner never turns into a mug display wall.
Add one small hook under the shelf for a tea towel. The towel dries fast there, and the corner reads as one neat morning station, not scattered storage.
13. Keep Cleaning Tools on the Sink End of the Board
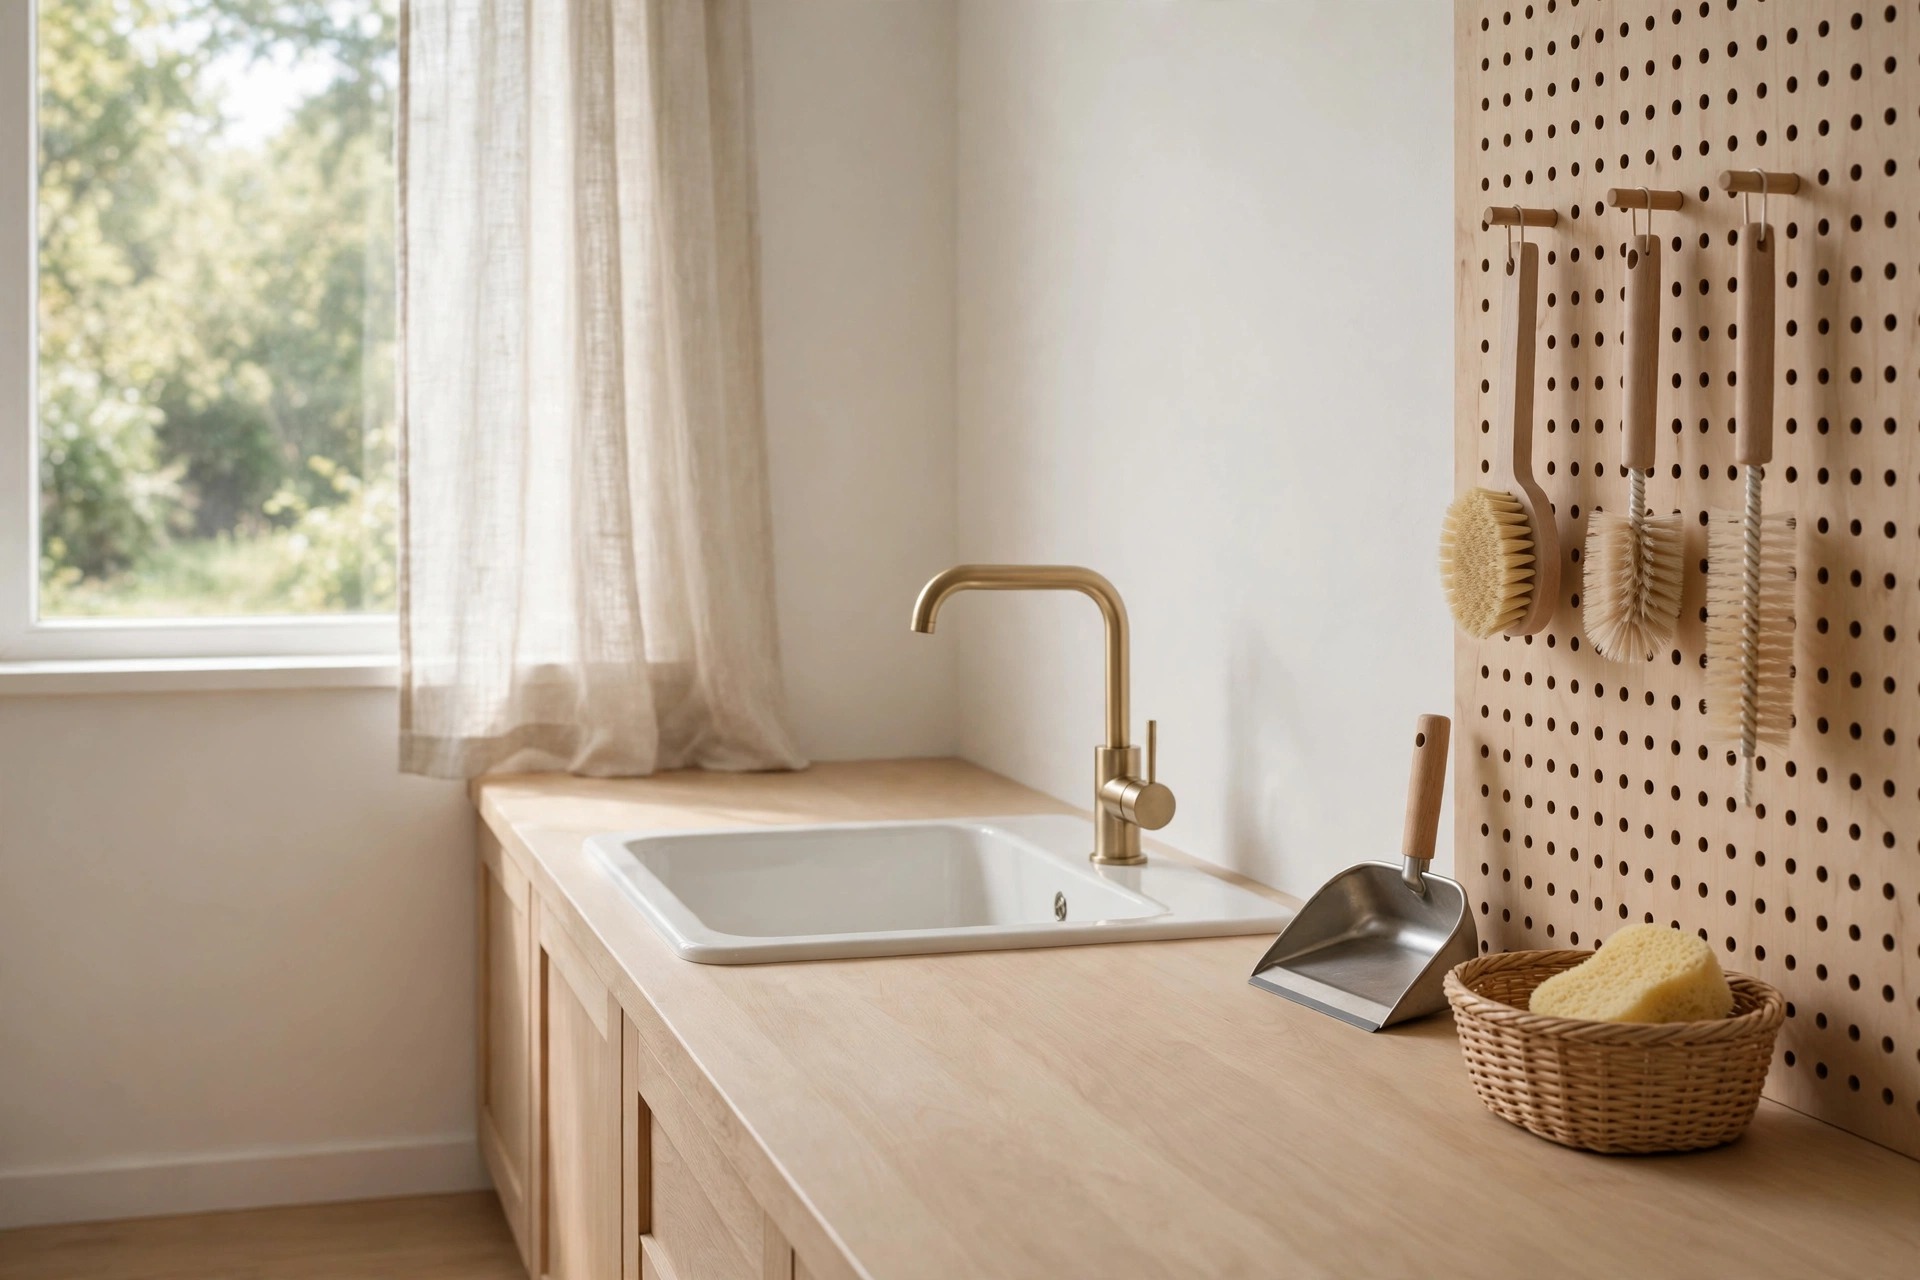
The sink end of the board earns its keep with cleaning gear. Brushes, a small dustpan, and a spare sponge hang there, off the wet counter.
Hang brushes bristle side down so water drains away from the board. A small basket under them catches drips and holds soap refills and sink plugs.
Keep this section apart from food tools with a clear gap of empty holes. One visual break tells everyone in the house where cooking tools end.
Wash this section last each week and dry the board fully. Cleaning gear holds moisture longest, so this corner needs air more than any other part of the wall.
14. Match Hook Finishes and Keep One Tool Color Family

Mixed hook finishes make a board look like a workshop wall. One finish across all hooks, baskets, and shelves makes the same board look planned.
Match the hook finish to your cabinet handles or faucet. The board then ties into hardware the kitchen already has, instead of adding a new metal tone.
Apply the same rule to tools where you can. Mostly wood and steel, or mostly one handle color, reads calm. A rail system follows the same logic in small kitchen ideas with magnetic wall storage rails.
When you replace a tool, match the family or retire an old one. One bright new handle is fine; five mixed colors slowly undo the calm of the wall.
15. Leave Empty Holes and Reset the Board Each Week

A full board has no room to grow. Leave about a quarter of the holes empty, spread across the board, for new tools and seasonal swaps.
That spare space also lets you shift hooks as habits change. The pan you use daily in winter may move aside for salad tools and tongs in summer.
Do a five minute reset once a week while the kettle heats. Return strays, wipe one shelf, and pair it with lessons from small kitchen ideas with open shelves on keeping open storage tidy.
Take a phone photo after each reset you like. When the board drifts again, the photo shows the working layout faster than memory or guesswork ever will.
Start with one board, one zone, and the tools you used yesterday. That short list tells you the right size, the right wall, and the right hooks.
These small kitchen ideas with a pegboard storage wall work best when the board stays edited, not full. Add slowly, keep heavy pieces low, and protect your empty holes.
Save this to your small kitchen ideas board for later, then measure your wall before you buy a single hook.


