
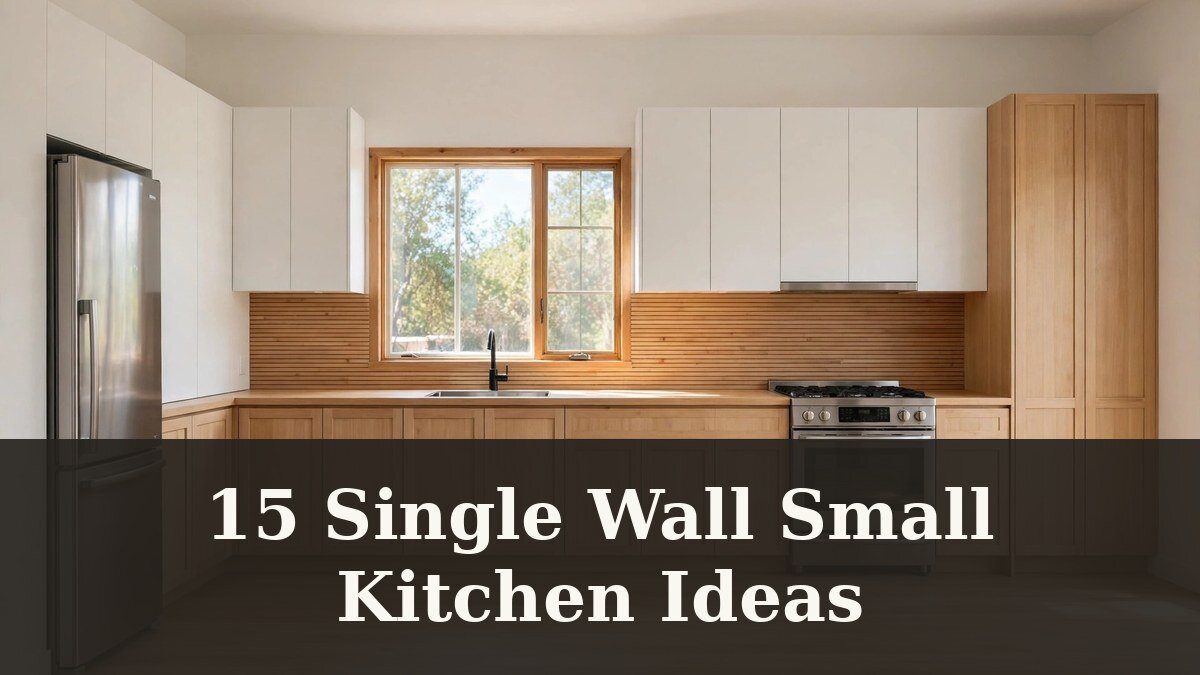
15 Small Kitchen Ideas With a Single Wall Layout Plan
One wall has to do every job in this kind of kitchen. The fridge, the sink, the cooker, and every drawer and shelf all line up on the same straight run.
That sounds tight, but a straight run has one clear strength. You work along a line, step by step, from cold storage to washing to cooking, with nothing hidden around a corner.
These small kitchen ideas with a single wall layout plan stay on that one run only. They cover the order of the stations, the gaps between them, and what belongs above and below the counter.
It is the layout behind most tiny kitchen ideas for studio apartments, and it rewards careful planning. Read your wall from one end to the other as you work through the list.
Plan the wall in the order you cook, not in the order the boxes happen to fit. Cold storage, washing, prep, and heat each take one place on the line, and the storage above and below follows that same order.
This post contains affiliate links. If you buy through them, we may earn a small commission at no extra cost to you. See our Affiliate Disclosure.
1. Put the Fridge at the Entry End of the Run

Start the run with the fridge at the end nearest the door. Groceries come in, go straight into cold storage, and never cross the sink or the hot cooker zone.
An end spot also suits the tallest, deepest box on the wall. It reads as a full stop at the edge of the run instead of a bulky break in the middle.
Check the door swing before you fix the spot. The door should open toward the room or the short end wall, not across the counter where someone is chopping.
Leave a short landing counter right beside the fridge handle. Milk, eggs, and a heavy bag of potatoes all need a place to land while you load the shelves.
2. Set the Sink Near the Middle of the Wall

The sink earns the middle spot because you visit it more than any other station. From the center, the fridge sits a few steps one way and the cooker a few steps the other.
Counter on both sides of the bowl matters more than bowl size. One side holds dirty dishes waiting their turn, and the other holds clean items draining or ready to put away.
If the wall has one window, the sink belongs under it. A cabinet over the sink would block the best light on the whole run and crowd your head at the bowl.
Keep the faucet toward the back edge of the counter, not floating mid counter. That small shift returns a strip of usable counter in front for a board or a mixing bowl.
3. Keep One Long Prep Stretch Between Sink and Cooker

Between the sink and the cooker, protect one long, clear stretch of counter. This is the main prep zone, where boards, bowls, and chopped piles all need room at the same time.
Resist splitting this stretch with a tall unit, a microwave, or a knife block village. Every break turns one workable surface into two small pads that fit almost nothing.
Aim for the longest unbroken length the wall allows, ideally around three feet. Onions pile up fast, and a board plus a bowl plus a scrap pile eats space in minutes.
For more ways to win back surface, these notes on how to add counter space in a small kitchen pair well with a one wall plan.
4. Place the Cooker Toward the Far End With Landing Space on Both Sides

The cooker sits best toward the far end of the run, away from the entry. Through traffic near the door then never brushes past hot pans or an open oven door.
Landing space on both sides is the rule that keeps this end safe to use. A hot tray needs a clear spot within one step, on the side your free hand expects.
The stretch toward the sink doubles as the shared prep counter from the last idea. The short stretch at the far end holds oil, salt, and the spoon rest for the pan.
End the run with a heat safe side panel or a small gap before the wall. Pan handles turn outward less often when the cooker is not wedged tight into a corner.
5. Reserve the Cabinet Under the Sink for Cleaning Gear Only
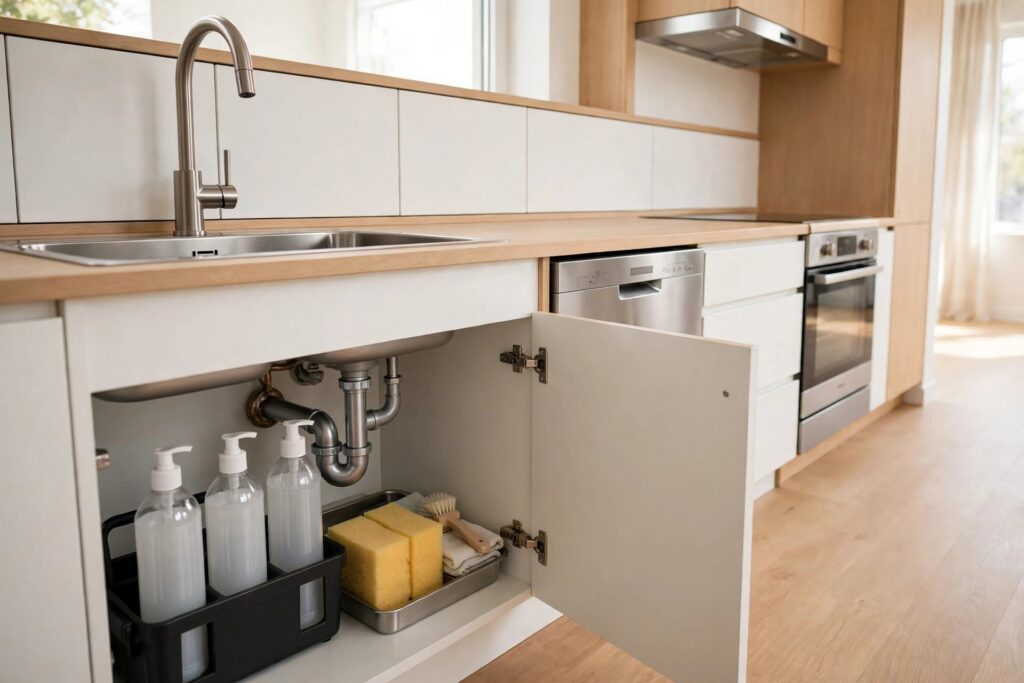
Below the sink, keep one job only: cleaning. Dish soap, spare sponges, bin bags, and the washing up bowl live here, grouped around the pipes in a caddy or a shallow tray.
The common mistake is treating this cabinet as spare food storage. Bottles end up behind the trap, labels get damp, and the one thing you need hides at the very back.
A small pull out frame or a door mounted rack keeps the daily bottles at the front. You grab them with wet hands, without kneeling and digging past the pipework.
Leave the back third of the cabinet empty on purpose. Plumbers and your own hands need that reach space, and an empty back keeps leaks easy to spot early.
6. Slide the Dishwasher in Right Beside the Sink

If a dishwasher joins the run, it goes directly beside the sink, on the side away from the main prep stretch. Rinsed plates move a few inches, not across the whole kitchen.
That spot also keeps the loading path short. You stand at the sink, turn slightly, and the open door and racks sit right at your hip for a fast load.
Check the open door against your standing spot. In a one wall kitchen you load from the front, so the door needs clear floor and no stool or bin in its swing.
Unloading follows the same short path. Put the cup and plate storage in the wall cabinet above or beside the dishwasher, so clean dishes travel upward, not along the run.
7. Fill the Base Under the Prep Stretch With Deep Drawers
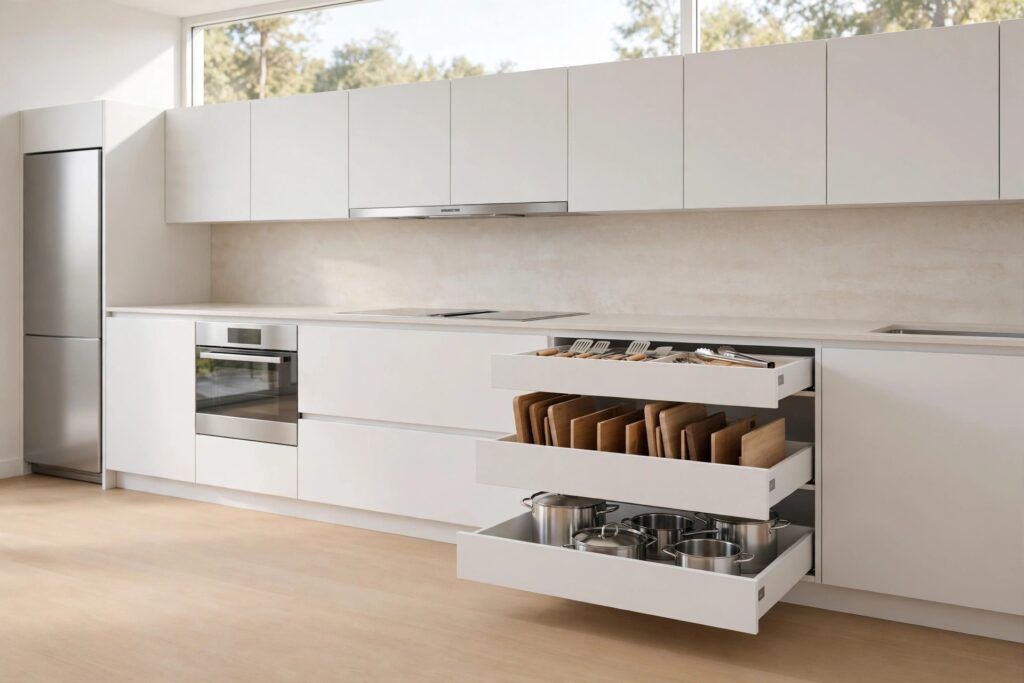
Under the main prep counter, deep drawers beat doors every time. Pots, mixing bowls, and boards slide out toward you, instead of hiding in a dark box you search on your knees.
Plan the stack by weight and reach. Heavy pans go in the bottom drawer, boards and trays stand upright in a divided middle drawer, and daily tools take the shallow top drawer.
The top drawer is the one you open with flour on your hands. Keep it to the few tools you grab mid task: a spatula, tongs, a peeler, and one good knife.
Drawers also hold the straight line of the run. A full row of drawer fronts reads calm and even from the room, with no odd door gaps breaking the base.
8. Cap One End of the Run With a Tall Pantry Tower

Every straight run needs a clean ending, and a tall pantry tower at one end gives it one. Dry goods, cereal boxes, and small appliances stack upward in a single narrow column.
Put the tower at the end opposite the fridge if the wall is long enough. Two tall end caps frame the run, and the lower middle section stays open and light.
On a shorter wall, one tall cap is enough. Two towers plus a fridge can swallow the counter, so let the fridge end stand as the single tall finish instead.
This end cap logic shows up in many small condo kitchen ideas too, where one wall often carries the whole kitchen. Shelve the tower by how often things get used, daily items at waist height.
9. Take the Wall Cabinets Up to the Ceiling in One Line

Above the counter, run the wall cabinets in one even line up to the ceiling. The gap above standard cabinets only gathers dust and wastes the tallest storage the wall offers.
Use the top row for the things you reach for a few times a year. The big roasting tin, the holiday platter, and the spare glasses live high, out of daily traffic.
Keep the cabinet bottoms at one level across the whole run. A stepped line of different heights makes a short wall look chopped up and shrinks the room from the doorway.
One long line also calms the view from the living side. In an open room, this wall is furniture as much as kitchen, and a clean top edge helps it sit quietly.
10. Leave a Light Break Above the Sink Instead of a Cabinet

One break in the upper run does the wall a favor. Above the sink, skip the cabinet and leave open wall, a window, or one or two shallow shelves for glasses.
Your head and shoulders gain room at the bowl, and steam from the sink rises clear instead of hitting a cabinet bottom. The middle of the run feels open at once.
Shallow shelves here should hold light, daily things only. A row of drinking glasses and a small plant suit the spot; heavy jars and stacked bowls do not.
Keep the break narrow and centered on the sink. A wide gap loses too much storage, while a sink width break gives the light without gutting the upper run.
11. Mount One Rail on the Backsplash for Daily Tools

The backsplash between the sink and the cooker is prime wall. One slim rail there lifts ladles, tongs, and scissors off the counter and out of the drawer shuffle.
Hang only what you use daily, in the order you reach for it. Tools near the cooker end serve the pans, and tools near the sink end serve washing and draining.
Leave real gaps on the rail. A crowded rail looks messy from the room and slows you down, because every grab means moving two other tools out of the way.
Keep the rail clear of the wettest sink splash zone and the hottest cooker edge. The middle stretch of backsplash, over the prep counter, is the calm spot it suits best.
12. Give Spices a Shallow Vertical Home Beside the Cooker
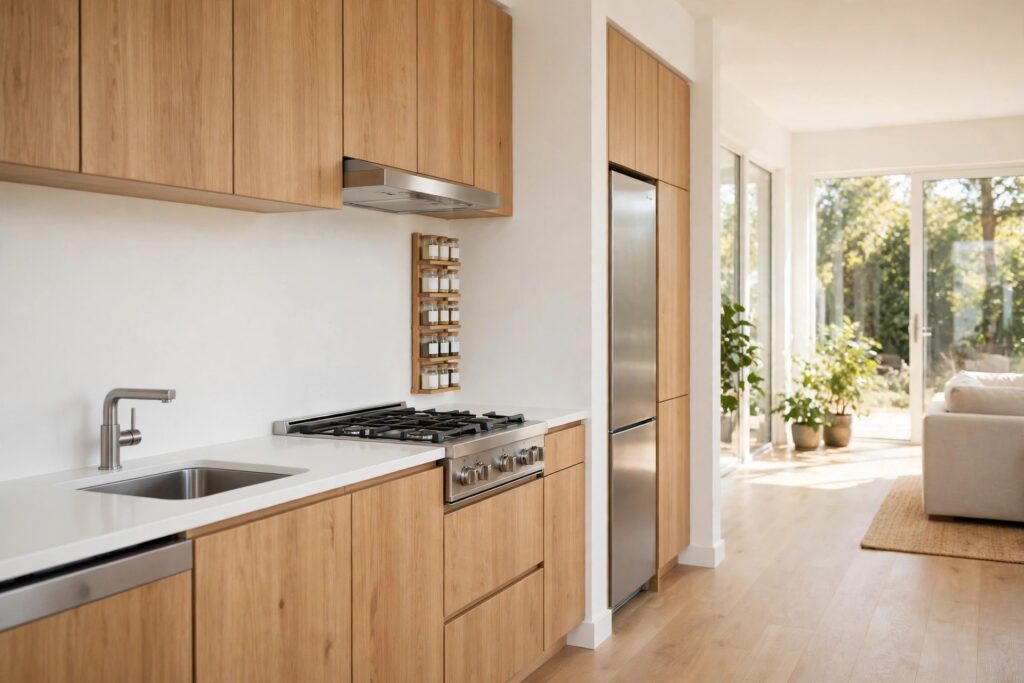
Spices belong beside the cooker, at eye or hand level, in a shallow vertical row. Deep cabinets bury the small jars, and the cumin always hides behind the oil bottle.
A narrow rack on the wall end, inside a slim cabinet, or on the backsplash edge keeps every label facing you. One layer deep is the rule; two layers deep is a hiding place.
Heat and steam argue for a small offset. Set the rack just beside the cooker zone rather than directly above it, so jars stay dry and labels stay readable.
For a fuller wall system, these small kitchen ideas with vertical spice storage walls build the same idea across a whole section of wall.
13. Run One Line of Light Under the Wall Cabinets
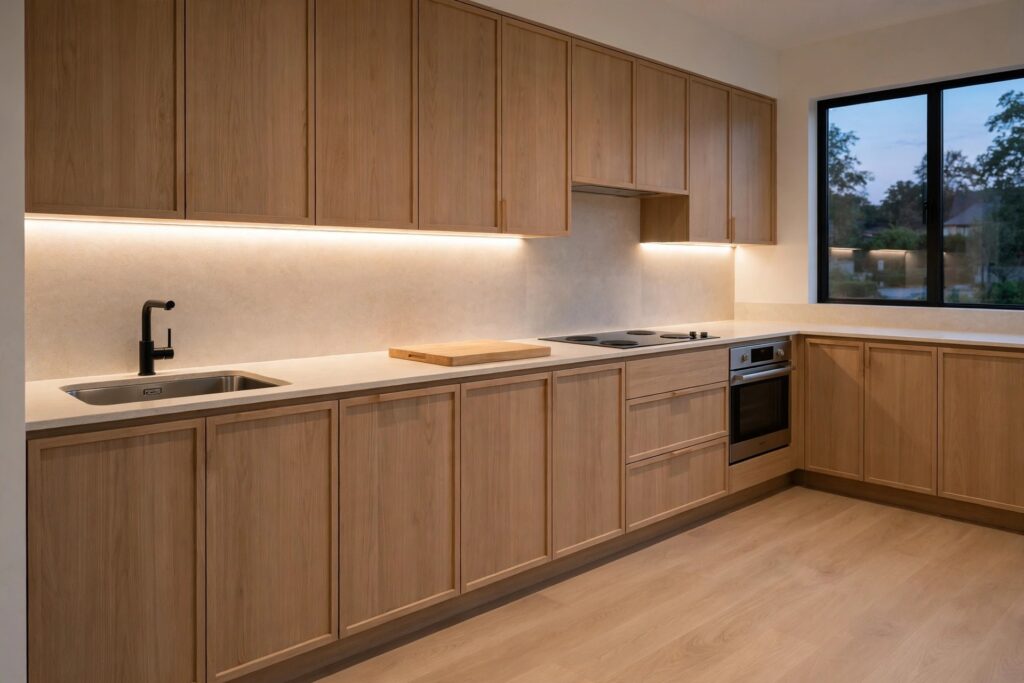
A single wall kitchen lives or dies by its counter light. One steady line of light under the wall cabinets covers the sink, the prep stretch, and the cooker in one sweep.
Ceiling light alone leaves your own shadow on the board. Light fixed under the cabinets lands in front of you, right on the chopping and washing zones where your eyes work.
Keep the color of the light the same along the whole run. Mixed warm and cool sections make one counter look clean and the next look dull, for no real reason.
An electrician handles the wiring for fitted strips. Once fitted, add a simple switch at counter height near the sink, where wet hands reach for it most often.
14. Keep the Facing Wall and the Floor in Front Clear

The space in front of the run is part of the plan, not leftover room. Keep the facing wall free of cabinets and keep the floor clear, so the kitchen reads as one wall only.
That clear floor is your working aisle and your breathing room. Oven doors open into it, two people pass in it, and a chair can pull up without blocking a drawer.
Resist the urge to add a second run opposite later. A one wall kitchen that gains a facing row stops being one wall, and the open feel goes with it.
If the room needs seats for two, keep them light and away from the run. A slim bar setup suits better, as shown in these small kitchen ideas with a breakfast bar for two.
15. Finish the Counter and Backsplash as One Unbroken Line

Finish the run with one counter material and one backsplash, carried from end cap to end cap without a change. A straight kitchen looks longer when nothing interrupts its longest lines.
Every joint and material swap shortens the wall on sight. One pale counter and a simple tile or panel backsplash let the eye travel the full length in one pass.
Match the handles and faucet finish along the run too. Small repeats of the same metal or black finish tie the fridge end to the cooker end like one piece of furniture.
Stand back at the doorway for the final check. If the wall reads as one calm line with clear stations, the plan works, and the room in front can stay simple.
A single wall kitchen works when the order along the wall is right. Fridge at one end, sink in the middle, clear prep space, then the cooker, with tall storage capping the run.
Start with the station that frustrates you daily, and fix that stretch first. The rest of the wall usually falls into place once the worst gap or clash is gone.
Save these small kitchen ideas with a single wall layout plan to your small kitchen ideas board for later, and work along your own wall one station at a time.


